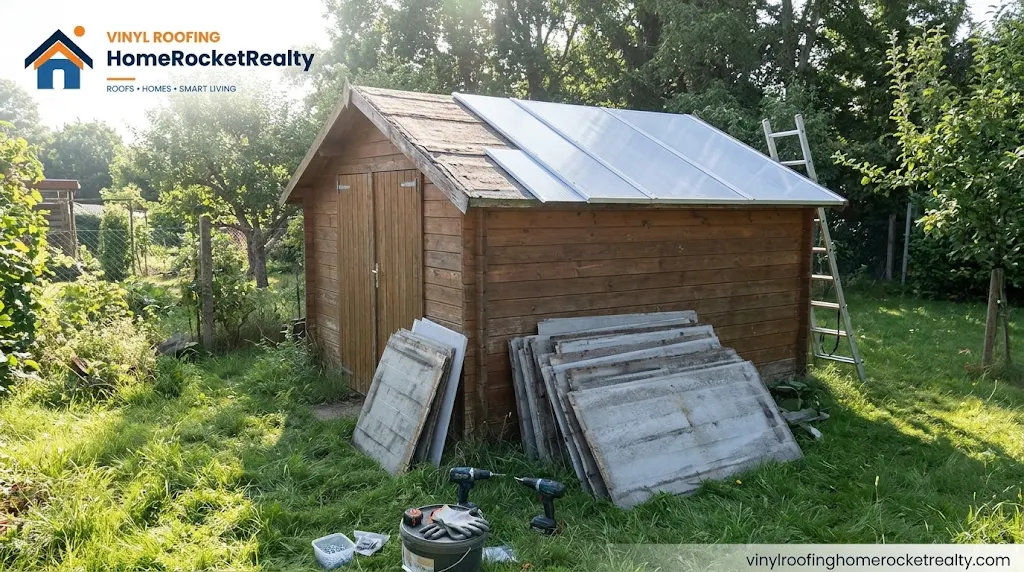
Sheds have a way of ignoring us until something goes wrong. One day you open the door and find a damp smell, a dripping corner and a box of tools that has started to rust. Nine times out of ten, the culprit is the roof. The good news is that a plastic shed roof is one of the easiest roofs to replace. Pick a dry weekend, gather a few tools, and you can have a fresh roof on before Sunday dinner.
First, find out what is really wrong
Before you buy anything, climb up (carefully) or look from a ladder and ask three questions. Are the panels cracked or brittle? Are the screws loose, rusted or missing? Is the wooden frame underneath soft or dark with damp? Cracked panels need replacing. Loose screws may only need fresh fixings. A rotten frame must be repaired first, otherwise the new roof will sag within a season.
Measure like you mean it
Write down the length and width of the roof, then add the overhang you want at the front and sides, usually around 5 cm on each. Check how wide one panel is once overlapped, because that is the number that decides how many sheets you need. Many people order one spare sheet. It costs little and saves a second trip when a panel cracks during cutting.
Choosing the new covering
For a plastic shed roofing job there are three popular choices:
- Corrugated PVC: cheap and light, fine for a simple garden shed.
- Corrugated polycarbonate: tougher and longer lasting, better for hail and heavy snow.
- Flat plastic sheets with battens: a neat look, though harder to ventilate.
If your shed stores tools and bikes, choose an opaque or light-tinted panel. Clear panels turn a shed into a greenhouse, and not in a good way.
What you will need
Gather everything first so you are not running to the shop with the roof half open: new panels, closure strips, self-drilling screws with sealing washers, sealant, a drill, a fine-tooth saw or tin snips, safety glasses, gloves, a tape measure and a sturdy ladder. A second pair of hands makes the whole job safer.
Step 1: Empty and cover
Move valuables out, or cover them with a tarp. Check the weather twice. A surprise shower with the roof off is the kind of lesson nobody wants.
Step 2: Remove the old panels
Start at the top edge and unscrew each fixing. Plastic sheets that have baked in the sun for years can snap suddenly, so wear gloves and glasses. Stack the old sheets flat, and check with your local waste centre about recycling.
Step 3: Fix the frame
With the roof open you can finally see the timber. Press it with a screwdriver. Soft spots mean rot. Replace those pieces or strengthen them with extra battens. Make sure the frame slopes slightly so water can run away. A gentle fall is enough, but a flat roof will pond.
Step 4: Lay the first panel
Begin on the side away from the wind. Let the sheet hang a few centimetres over the lower edge so water drips clear of the wall. Pre-drill slightly oversized holes, then fix through the top of the ridges. Do not crank the screws too tight. The washer should sit snug, not crush.
Step 5: Overlap and continue
Overlap each new sheet by at least one full wave, and by two if your roof is low-pitched. Add closure strips at the top and bottom to keep out insects and wind-blown rain. Work your way across, checking that each sheet is straight.
Step 6: Seal and finish
Run sealant along the wall junction and any gaps. Look from inside the shed on a sunny day. Any pin-sized light spots hint at a gap that could leak. Fix them now.
How long should it last?
A decent corrugated plastic roof can serve a shed for well over ten years if installed carefully and kept clean. Tougher polycarbonate can go longer. Cheap thin sheets under strong sun may not make it past a few seasons, so spend a little more on quality.
Care routine
Sweep leaves twice a year, rinse with mild soap and a soft brush, and check screws after big storms. If a panel cracks, swap that one panel rather than waiting for the whole roof to fail.
Mistakes people repeat
- Skipping the frame check and fitting new panels over rotten wood.
- Using nails instead of proper screws with washers.
- Pulling screws too tight and cracking the plastic.
- Forgetting the overhang, so water runs down the shed wall.
- Choosing clear panels and cooking everything inside.
Final thoughts
Replacing a shed roof is not glamorous, but it is deeply satisfying. A dry shed protects tools, bikes and memories for years. Do the checks, take your time with the fixings, and finish the day with a cup of tea under a roof that does not drip.